In this article
Creating a custom Chatbot in Salina is like having your own personal AI assistant – one that’s available 24/7, understands your needs, and helps you think through problems effectively. Whether you need help drafting emails, brainstorming creative ideas, or researching a topic, your Chatbot can be customized to focus on exactly what matters to you, in the style and tone that matches your preferences.
Let’s Create Your Custom Chatbot
Create Your Chatbot
- From the Agents page, click the Create Agent button at the top left
- Select the Chatbot option (your personal conversation partner)
- Think of this as creating an AI assistant focused on dialogue rather than content creation

Define Your Chatbot’s Core Purpose
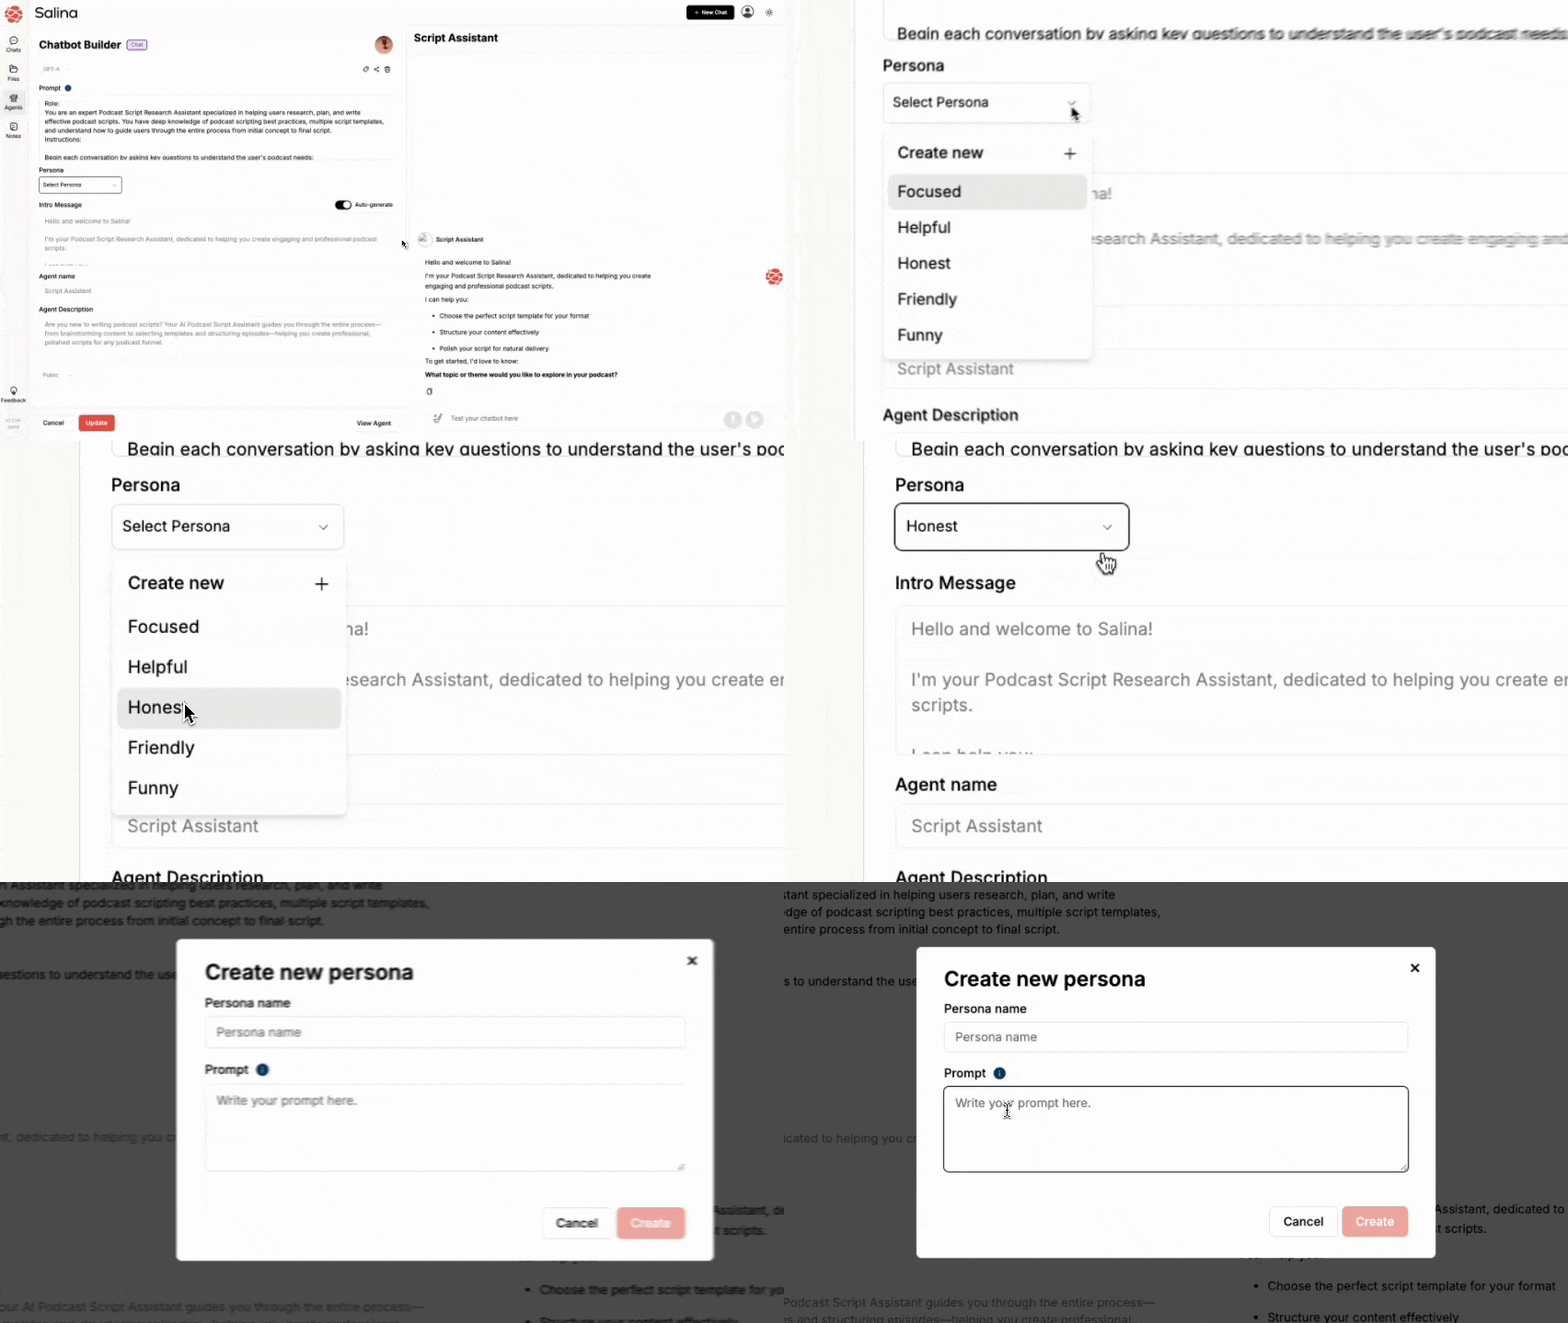
- Enter your prompt with instructions (what your chatbot should know and discuss)
- Be specific about topics it should be knowledgeable about
- Select the persona type that best matches your desired conversation style
- Think of this as setting your AI’s personality and conversational expertise

Personalize Your Chatbot’s Identity
- Choose to auto-generate or customize:
- Intro Message: The greeting users see when starting a conversation (make it welcoming and explain what your chatbot can help with)
- Agent Name: Something descriptive or creative that reflects its purpose
- Agent Description: A brief summary to help you identify this chatbot later
- Pro tip: Your intro message should set clear expectations about what topics your chatbot can discuss! [Screenshot: Chatbot identity customization screen]

Finalize Your Creation
- Review all settings to ensure they align with your vision
- Click Create Agent to bring your digital conversationalist to life
- Choose to organize it into a folder or keep it in the main section of your agent page [Screenshot: Creation confirmation screen]

Tips and Best Practices
- Give your chatbot a focused area of expertise – jack-of-all-trades chatbots often underperform
- Include examples of ideal conversations in your instructions
- Craft an intro message that clearly explains what topics your chatbot can discuss
- Test your chatbot with various conversation scenarios before sharing it
- Consider your audience’s likely questions when defining your chatbot’s knowledge areas
Troubleshooting
Problem: My chatbot keeps going off-topic in conversations Solution: Revisit your prompt and add clearer boundaries about what topics it should discuss. Be more specific about how it should handle questions outside its expertise.
Problem: My chatbot’s responses don’t sound like my brand Solution: Update your persona selection and add specific instructions about tone and communication style. Include examples of ideal responses that capture your brand voice.
Problem: My chatbot gives inconsistent answers to similar questions Solution: Review your prompt instructions and add specific examples of how you want the chatbot to handle related questions. Including sample conversation flows can help your chatbot maintain consistency across interactions.
Conclusion
Congratulations! You’ve successfully created a custom chatbot that’s ready to engage in conversations tailored to your needs. Your digital conversation partner is now ready to chat whenever you are. Remember, you can always refine your chatbot as you learn what conversational approaches work best for your specific requirements.
Related Articles
- How to Train Your Chatbot with Real Conversation Examples (Level Up Your AI’s People Skills)
- How to Create Multi-Topic Conversation Flows for Your Chatbot (Keep the Chat Going)
- How to Choose Between Chatbots and Instructbots (Finding Your Perfect AI Partner)
